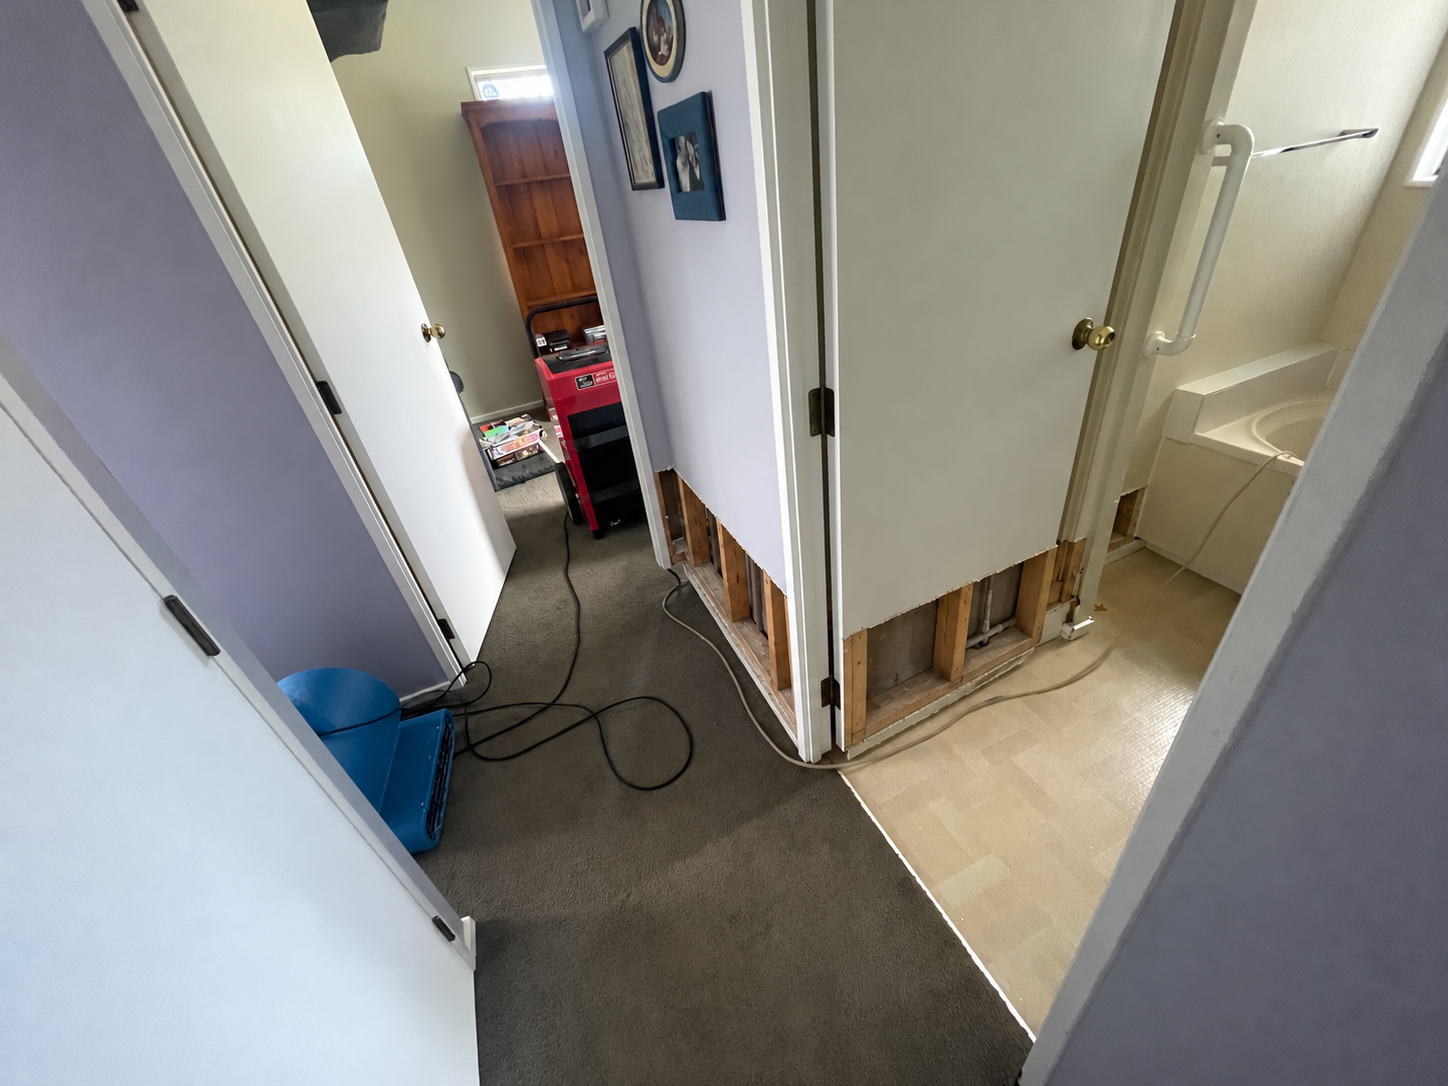
Quick answer: A shower leak can travel beyond the bathroom and wet adjoining carpet, underlay and the lower parts of wall linings. In this Auckland case, the affected path extended from the shower area into the hallway, an adjoining room and a wardrobe. The drying plan used air movement, commercial dehumidification, lower-wall inspection where indicated, and repeat moisture checks—rather than relying on whether the carpet felt dry.
Case facts at a glance
| Water source | Shower leak |
|---|---|
| Areas assessed | Hallway, adjoining room/bedroom, wardrobe, carpet, underlay and lower wall linings |
| Drying approach | Commercial dehumidification, directed air movement, selective lower-GIB inspection and repeat monitoring |
| Release decision | Based on moisture trends and comparison with a suitable dry reference—not surface feel alone |
Can a shower leak wet carpet and walls in another room?
Yes. Water can move out of a bathroom through door thresholds, below carpet and underlay, along skirting lines and into connected rooms or wardrobes. That is why the full path needs to be assessed and monitored, not just the area where the leak was discovered.
Typical monitored drying sequence for a shower leak
This is the practical process commonly used for a shower leak affecting carpet, underlay and lower wall linings. The final scope always follows inspection and moisture readings.
1. Stop the source and make the area safe
The shower should remain out of use until the source has been checked and repaired. A qualified plumber identifies the failed shower-plumbing or enclosure component before drying is relied on. Electrical risks, wet power points and loose leads are assessed before equipment is placed.
2. Establish a drying baseline
At the first visit, affected carpet, underlay, lower GIB, skirting and accessible cavity areas are compared with suitable dry-reference materials. Temperature and relative humidity are also recorded because they affect how quickly materials can release moisture.
3. Use a planned equipment layout
Commercial dehumidification works with directed air movement. A commercial dehumidifier and multiple air movers are positioned across the hallway, room and wardrobe path so evaporation can occur from carpet, lower walls and enclosed spaces. Equipment quantity and positioning are adjusted to the actual layout and monitoring results.
4. Re-check and adjust
A common sequence is an initial assessment, a first monitoring visit after the drying system has been operating, then further checks until readings are stable near the dry reference. Small contained areas may progress quickly; carpet plus underlay, adjoining rooms and wall cavities commonly require monitoring over several days.
5. Confirm the material outcome
Carpet, underlay and wall linings are assessed individually. Some materials may be dried in place where condition and hygiene allow; others may need selective removal. Where lower GIB is opened for inspection or access, reinstatement should wait until the cavity and surrounding materials have been verified dry.
What the homeowner should do first
- Stop using the shower and isolate the water source if it is safe.
- Keep clear of wet electrical items, power points and loose cords.
- Move light furniture and valuables off affected carpet where practical.
- Photograph the affected areas before major removal or repairs.
- Do not assume dry-feeling carpet means the underlay or wall cavity is dry.
- Arrange assessment of the shower, adjoining carpet, skirting and lower walls promptly.
- Keep drying equipment running as directed until moisture checks support release.
What happened
A leak associated with the shower affected the carpeted hallway and continued into an adjoining room and wardrobe. Water can move beneath carpet and underlay, along skirting lines and through openings around doorways. That means the visible wet area is not always the full drying scope.
The first priorities for this type of loss are to stop the water source, make the area electrically safe, inspect the affected materials and begin controlled drying. Where wall-lining moisture is suspected, an inspection opening at the bottom of the GIB can help assess the cavity and avoid trapping moisture behind an apparently dry surface.
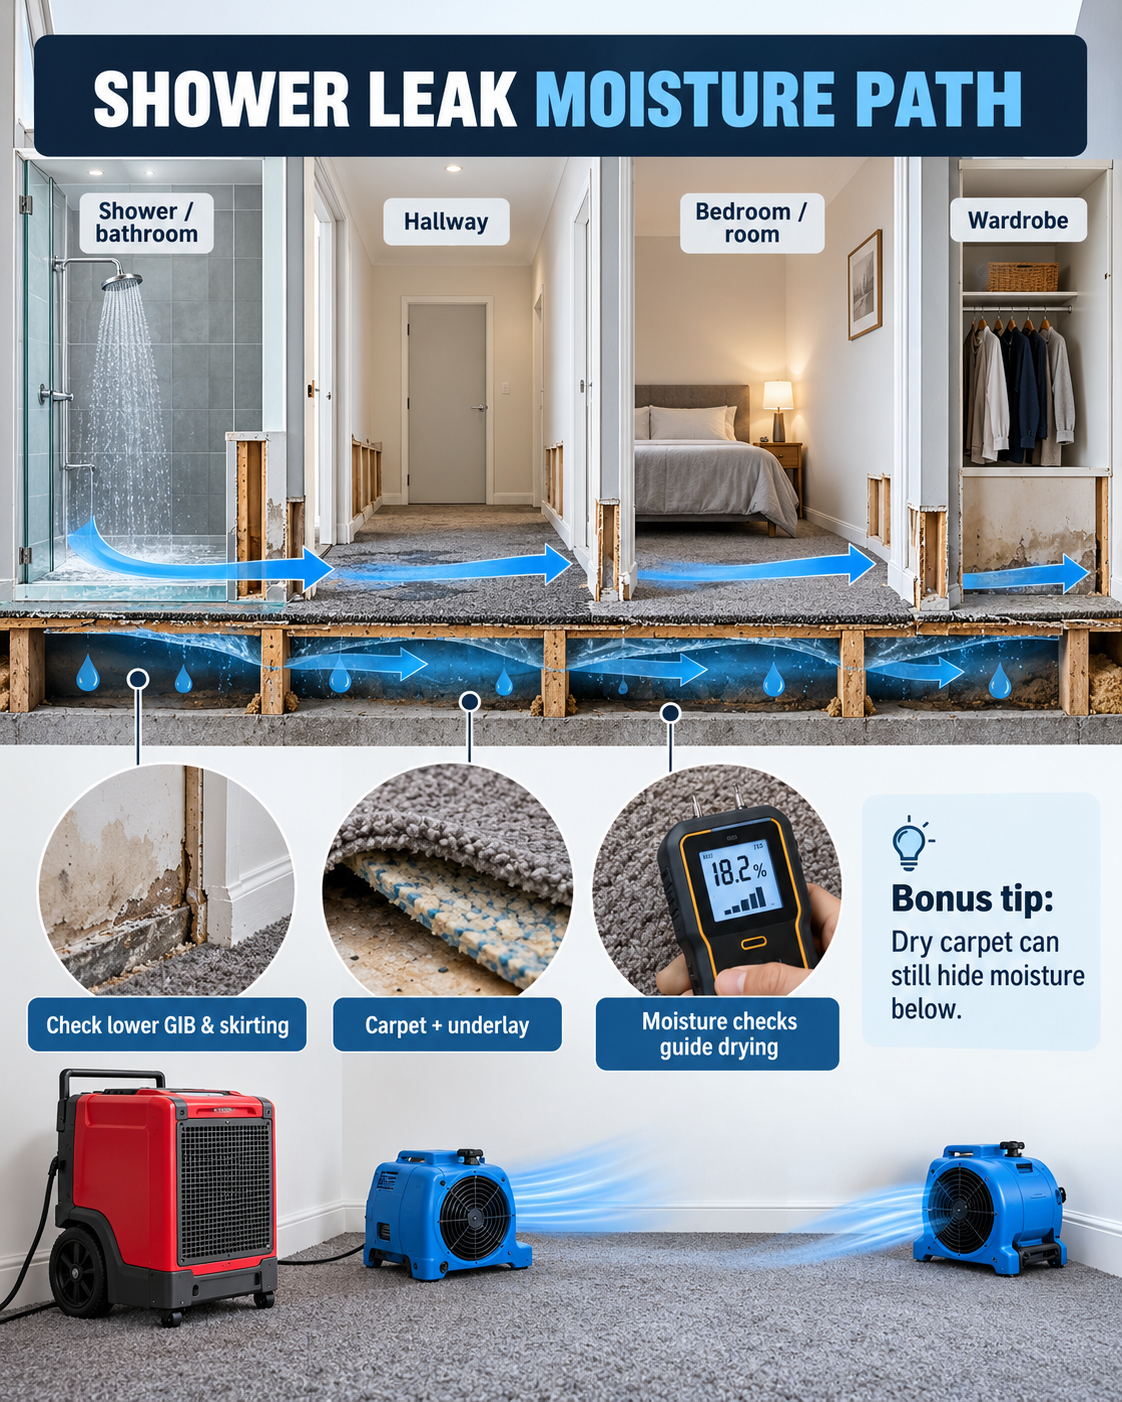
Affected-area moisture path
This diagram shows the likely relationship between the shower, hall, room and wardrobe; it is a drying-layout schematic, not a building plan.
Why the lower GIB was opened
The lower strip of GIB/plasterboard was opened selectively where inspection was needed. This gives access to the lower wall cavity and framing area, helps assess whether moisture has travelled behind the lining, and lets air movement reach materials that cannot be checked reliably from the painted surface alone. Opening wall linings is not automatic for every leak; the decision depends on the source, extent, material condition, readings and whether moisture can be safely dried in place.
Drying setup for carpet, underlay and lower walls
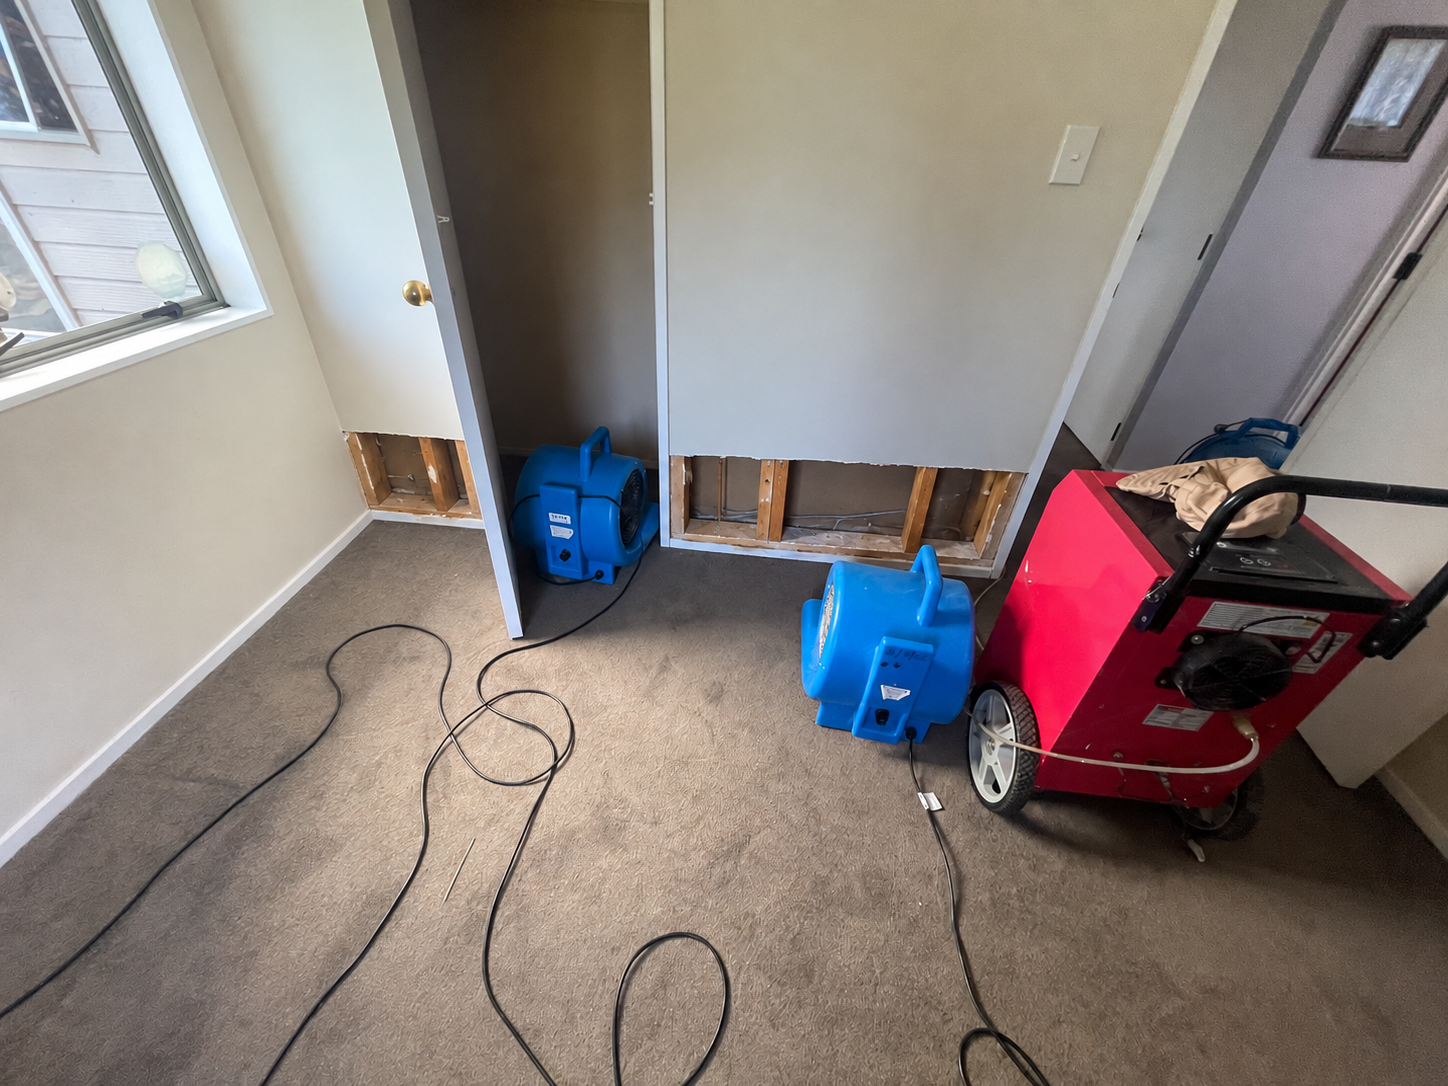
The job used commercial drying equipment placed to create a controlled airflow path through the affected spaces. Air movers support evaporation from carpet and lower wall surfaces, while a commercial dehumidifier removes moisture from the air so that evaporation can continue. Equipment needs to be positioned for the actual room layout, not simply switched on in one corner.
- Carpet and underlay: checked for moisture migration and whether drying in place is appropriate.
- Lower walls and skirting: assessed because water can wick into linings and cavities.
- Hallway and wardrobe: included in the air path because enclosed areas can dry more slowly.
- Equipment: air movers direct air across affected materials; dehumidification manages the moisture that enters the room air.
Moisture monitoring: how drying decisions are made
Drying is verified with a trend of readings, not by appearance alone. A technician compares affected materials with an appropriate dry reference area, records conditions and adjusts the drying layout where necessary. The goal is to confirm that moisture has been reduced to an acceptable, stable condition for the material—not to promise a fixed number of days.
| What is checked | Why it matters | What guides the next step |
|---|---|---|
| Carpet and underlay condition | Surface dryness can differ from the layers below. | Whether to continue drying, lift sections for inspection, or change the drying plan. |
| Lower GIB, skirting and wall cavity | Moisture may wick upward or remain concealed behind paint. | Comparison with a dry reference and the direction of repeat readings. |
| Temperature and relative humidity | Room conditions affect evaporation and dehumidifier performance. | Equipment placement, containment and ventilation decisions. |
| Daily moisture trend | A stable downward trend is more meaningful than one isolated reading. | Whether drying continues or materials are ready for re-check and release. |
Typical drying progression—not a fixed promise
| Stage | What happens | Typical timing |
|---|---|---|
| Assessment and source control | Stop the leak, inspect carpet, walls, access points and safety issues. | As soon as practical after discovery. |
| Initial drying | Set air movement and dehumidification; establish baseline condition. | Begins after the area is made safe. |
| Monitoring and adjustment | Repeat readings, reposition equipment and check enclosed areas. | Often over several days; depends on material and extent. |
| Verification | Confirm materials are dry against a suitable reference before removal. | Only when readings and conditions support release. |
Small, contained clean-water areas may progress quickly, while carpet plus underlay, several rooms, wall linings or cavities can take longer. The source repair, water category, access, building materials and weather all affect the schedule.
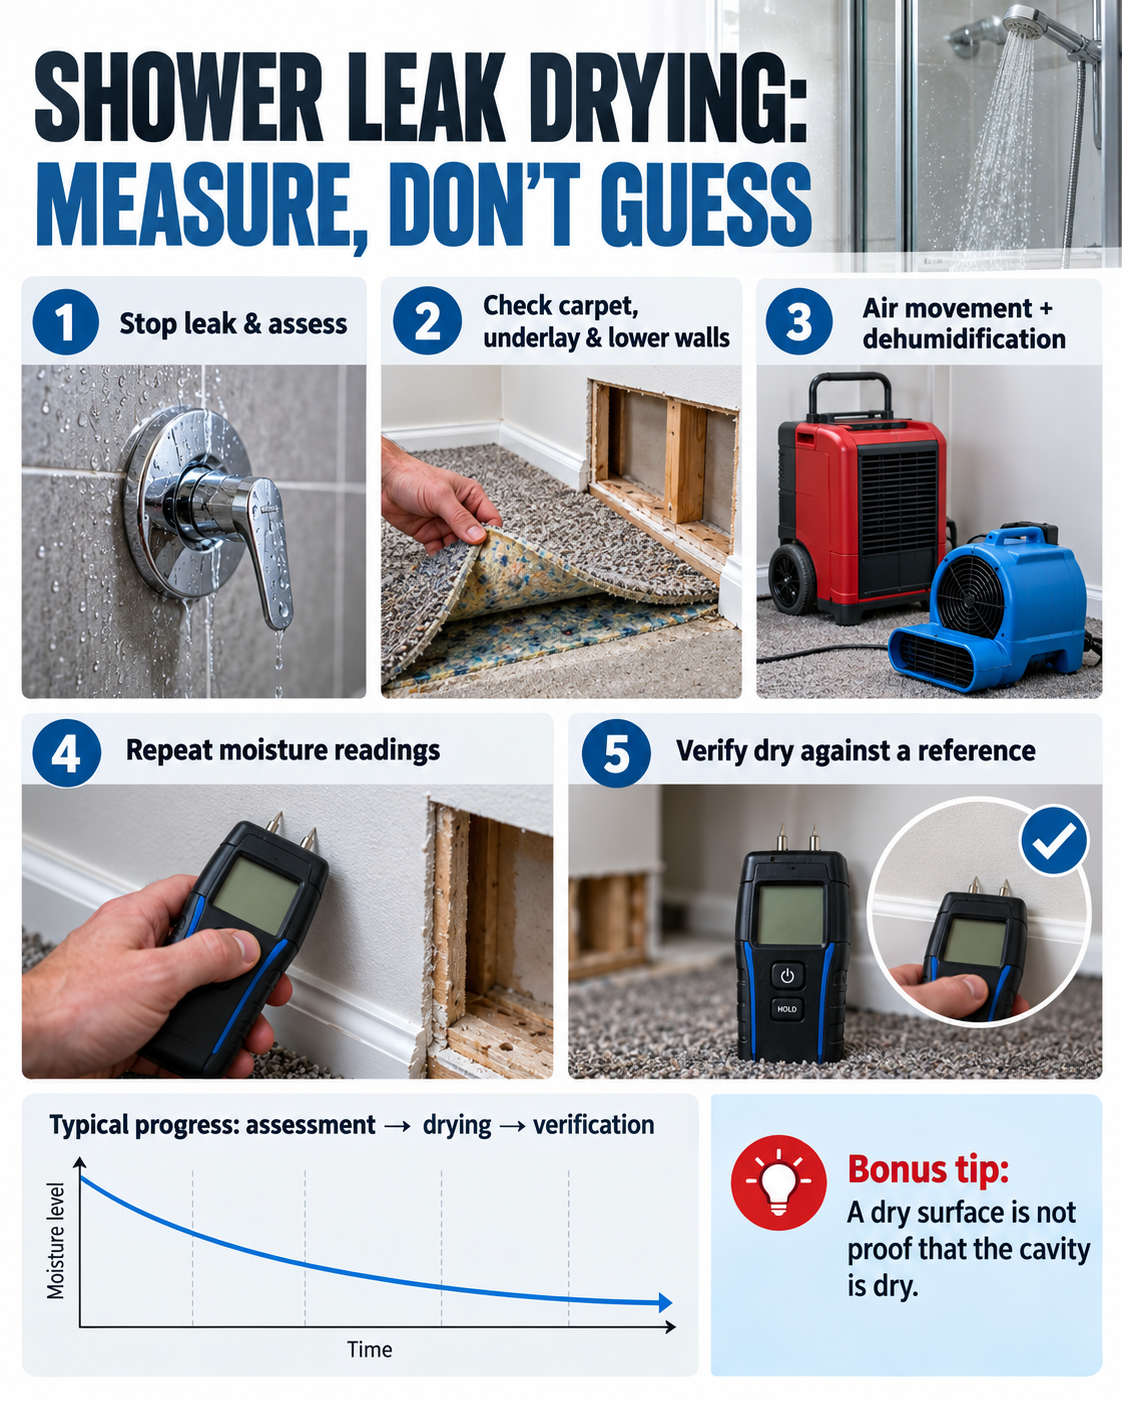
Drying process infographic
Indicative scope and cost factors
Restoration costs should be scoped after inspection, not guessed from a photograph. This table shows the kinds of factors that commonly move a job from a simpler drying scope to a more involved one. It is not a quote or a record of the cost of this job.
| Typical indicator | Likely scope | Why the cost changes |
|---|---|---|
| One small area; carpet only | Limited assessment and drying equipment. | Smaller affected footprint and fewer materials to monitor. |
| Carpet and underlay; one or two rooms | More equipment, monitoring and access checks. | Moisture can travel beneath carpet and through doorways. |
| Multiple rooms; walls, framing or specialist work | Detailed inspection, wall-cavity decisions, longer monitoring and possible repair coordination. | Hidden moisture, material removal, access and reinstatement needs can expand the scope. |
Questions this case study answers
Can a shower leak wet carpet in another room?
Yes. Water can pass through bathroom thresholds, beneath carpet and underlay, along skirting lines and into adjoining rooms or wardrobes. The affected footprint should be assessed rather than assumed from the bathroom alone.
Does wet GIB need to be cut after a shower leak?
Not always. Lower GIB may be opened when inspection or drying access is required. The decision should follow the water source, moisture findings, material condition and whether the cavity can be safely dried and verified.
Can carpet and underlay be dried after a leak?
Sometimes. Whether carpet and underlay can be dried depends on the water source, contamination risk, how long materials were wet, the extent of migration and the condition of the materials after inspection.
How do drying fans and a dehumidifier help after water damage?
Air movers increase evaporation from wet materials. A dehumidifier removes water vapour from the air so that evaporation can continue. The equipment works best as a planned system with moisture monitoring, not as a substitute for finding the source.
How do you know when wet walls and carpet are dry?
Use repeat moisture readings and compare the affected material with a suitable dry reference. A dry-feeling surface alone does not confirm that underlay or a wall cavity is dry.